There’s something satisfying about turning a few willow sticks into a wreath for your own front door. You can pile on the Christmas greenery, add a handful of dried flowers or keep it simple with a ribbon bow.
For our wreath, we used 6–7 willow sticks, soaked for a couple of hours before bending. Here’s how to make a base of your own, with a short video and written steps you can follow as you go.

Willow sticks for wreath making
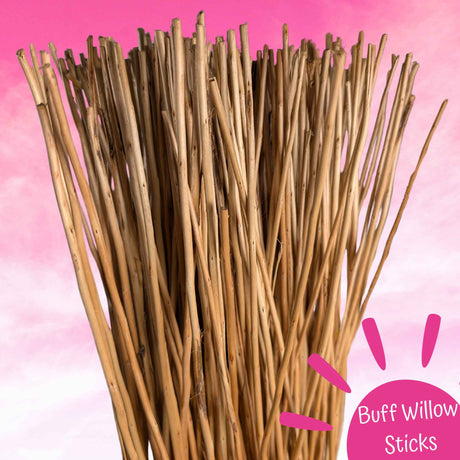
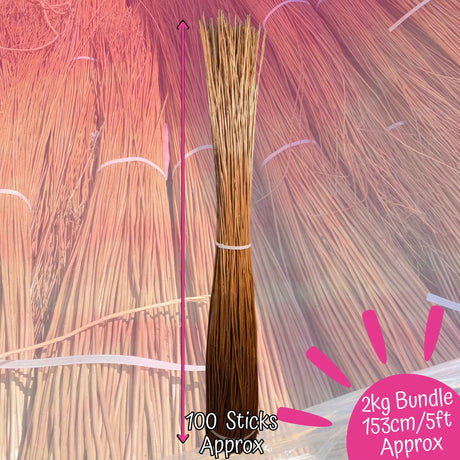
If you’ve used our willow for lanterns or sculptures, you already have the right material. The same willow sticks can be soaked and shaped into wreath bases. We supply one type of willow in 2kg and 5kg bundles, so you can choose the quantity that suits your plans.
The sticks, also called withies, are approximately 5–6ft long and taper from a thicker end to a fine tip. Colour can vary, and withies can also be dyed, so the willow you use may look different from the sticks in a photograph or tutorial.
A slim ring looks lovely with some of the weave left showing. Add more rods if you’d like a fuller base for your decorations.
What you’ll need
- 6–7 willow sticks for a base like ours, with a few spares if you want to make it thicker.
- Water and a suitable container for soaking.
- Secateurs for trimming.
- A little twine to help secure the first loop, if needed.
- Ribbon or twine for hanging.
- Your choice of decorations.
The number of sticks you need will vary with the size and thickness of your wreath. Clear a bit of space before you start: long withies have a habit of taking up more of the table than you expect.

Watch us make a willow wreath
Watch the demonstration to see how the rods wrap around the ring, or follow the steps below at your own pace.
Our wreath uses 6–7 sticks soaked for a couple of hours.
How to make a willow wreath, step by step
1. Soak your willow
Soak your willow sticks for a couple of hours before making your circle. We’ve found this works well with our withies. Use a container that allows the rods to be submerged, or consider our willow soaking bag, checking its dimensions against your sticks.
You can use dry willow for straight frameworks and gentle bends. For a wreath, soaking gives it the flexibility needed to work around a tighter curve.

2. Gently bend the first stick
Take a soaked rod and ease it into a curve, moving your hands along its length as you bend. Spread the curve along the stick rather than bending it sharply in one place.
Go slowly around the thicker end. If a stick resists or begins to split, stop and check that it’s ready to bend. Put damaged rods aside.

3. Form the first circle
Bring the rod into a loop, leaving the long, thin end free. Start with a slightly larger circle than you need, then gently adjust its size.
Hold the overlap and wind the thin end around the ring, passing it through the centre and back around. Tuck the tip into the weave. A short piece of twine can hold the overlap if you need an extra hand.
Don’t worry if it looks a little wonky. This is just the beginning of the base.

4. Weave in another stick
Push the thick end of your next rod into a gap in the ring. Start a little further around the circle so the thick ends aren’t all in the same place.
Hold the new rod steady and wrap its length around the ring in the same direction as before. Guide the thin tip through the middle each time, taking care not to pull a sharp kink into the stick.

5. Build up the ring
Keep adding rods, choosing a different starting point each time. This helps spread the thickness evenly around your wreath.
We used 6–7 sticks for ours. You can add more if you’d like a thicker base. Lay the ring flat or hold it up occasionally to check the shape, making gentle adjustments while the willow is still workable.

6. Tidy up and add a hanging loop
Tuck loose tips into the weave, then carefully snip off projecting ends with secateurs. Leave the rods holding the ring together intact. If children are helping, an adult can take care of the trimming.
Tie ribbon or twine around a sturdy section to make your hanger. Lift the wreath up and check that everything feels secure. Your base is ready to decorate.

A few ideas for decorating your wreath
You don’t need much to finish it off. A bow and a small bunch of foliage can look just as good as a fully covered wreath.
- For Christmas: try evergreen foliage, pine cones and dried orange slices.
- To show off the willow: decorate one side and leave the rest of the ring bare.
- For another season: use dried flowers, seed heads or a different ribbon.
Attach your decorations with suitable twine or florist wire. Start with a few pieces, hang the wreath up and have a look before adding more.

A couple of things people often ask
Why isn’t my wreath round?
The first loop often looks uneven. Spread the thick ends around as you add sticks and gently adjust the shape while you work. Check it from a little distance too; it’s easier to spot a bulky section when it isn’t right under your nose.
Why is my willow cracking?
The rod may not be ready to bend, may be damaged or may be bending too sharply in one spot. Stop and check it rather than forcing it. Work along the length to make a gradual curve, and use another rod if one is damaged.
Can I reuse the base next year?
If it’s still sound, yes. Remove old foliage and decorations, let the base dry thoroughly and store it somewhere dry and ventilated. Check for broken sticks or loose sections before decorating it again.
Choose your willow bundle
Our 2kg bundle is the smaller option for wreath projects and other willow crafts. The 5kg bundle gives you more to share between a group or use across several workshops.
If you’re organising a wreath-making session, make a sample first to help work out quantities. Allow a few spare rods for practice and soak the willow before everyone arrives.
Choose a 2kg or 5kg willow bundle and get your wreath-making supplies ready.